> ## Documentation Index
> Fetch the complete documentation index at: https://asapp-04-04-getting-started-ga.mintlify.site/llms.txt
> Use this file to discover all available pages before exploring further.
# Connecting your Knowledge Base
> Learn how to import, sync, and deploy your Knowledge Base for GenerativeAgent.
Your knowledge base is crucial for GenerativeAgent to provide accurate and contextually relevant responses to users. You have full control over which articles are included, their update frequency, and how those updates are deployed.
All content and update management occurs within the ASAPP dashboard.
 GenerativeAgent's Knowledge Base is designed to store reference material that GenerativeAgent can use to answer a variety of customer questions—both explicit (“What is the return policy?”) and implicit (“I don't understand ‘eligible for store credit’”).
GenerativeAgent determines if a question should be answered from the Knowledge Base and searches for the most relevant content.
To configure your Knowledge Base, you need to:
1. Import your knowledge base
2. Configure sync and deployment preferences
3. Deploy knowledge base articles
Do not upload internal, agent-facing knowledge base material intended only for live agents. Use GenerativeAgent’s task instructions for internal-only guidance.
## Step 1: Importing Your Knowledge Base
You can import content by:
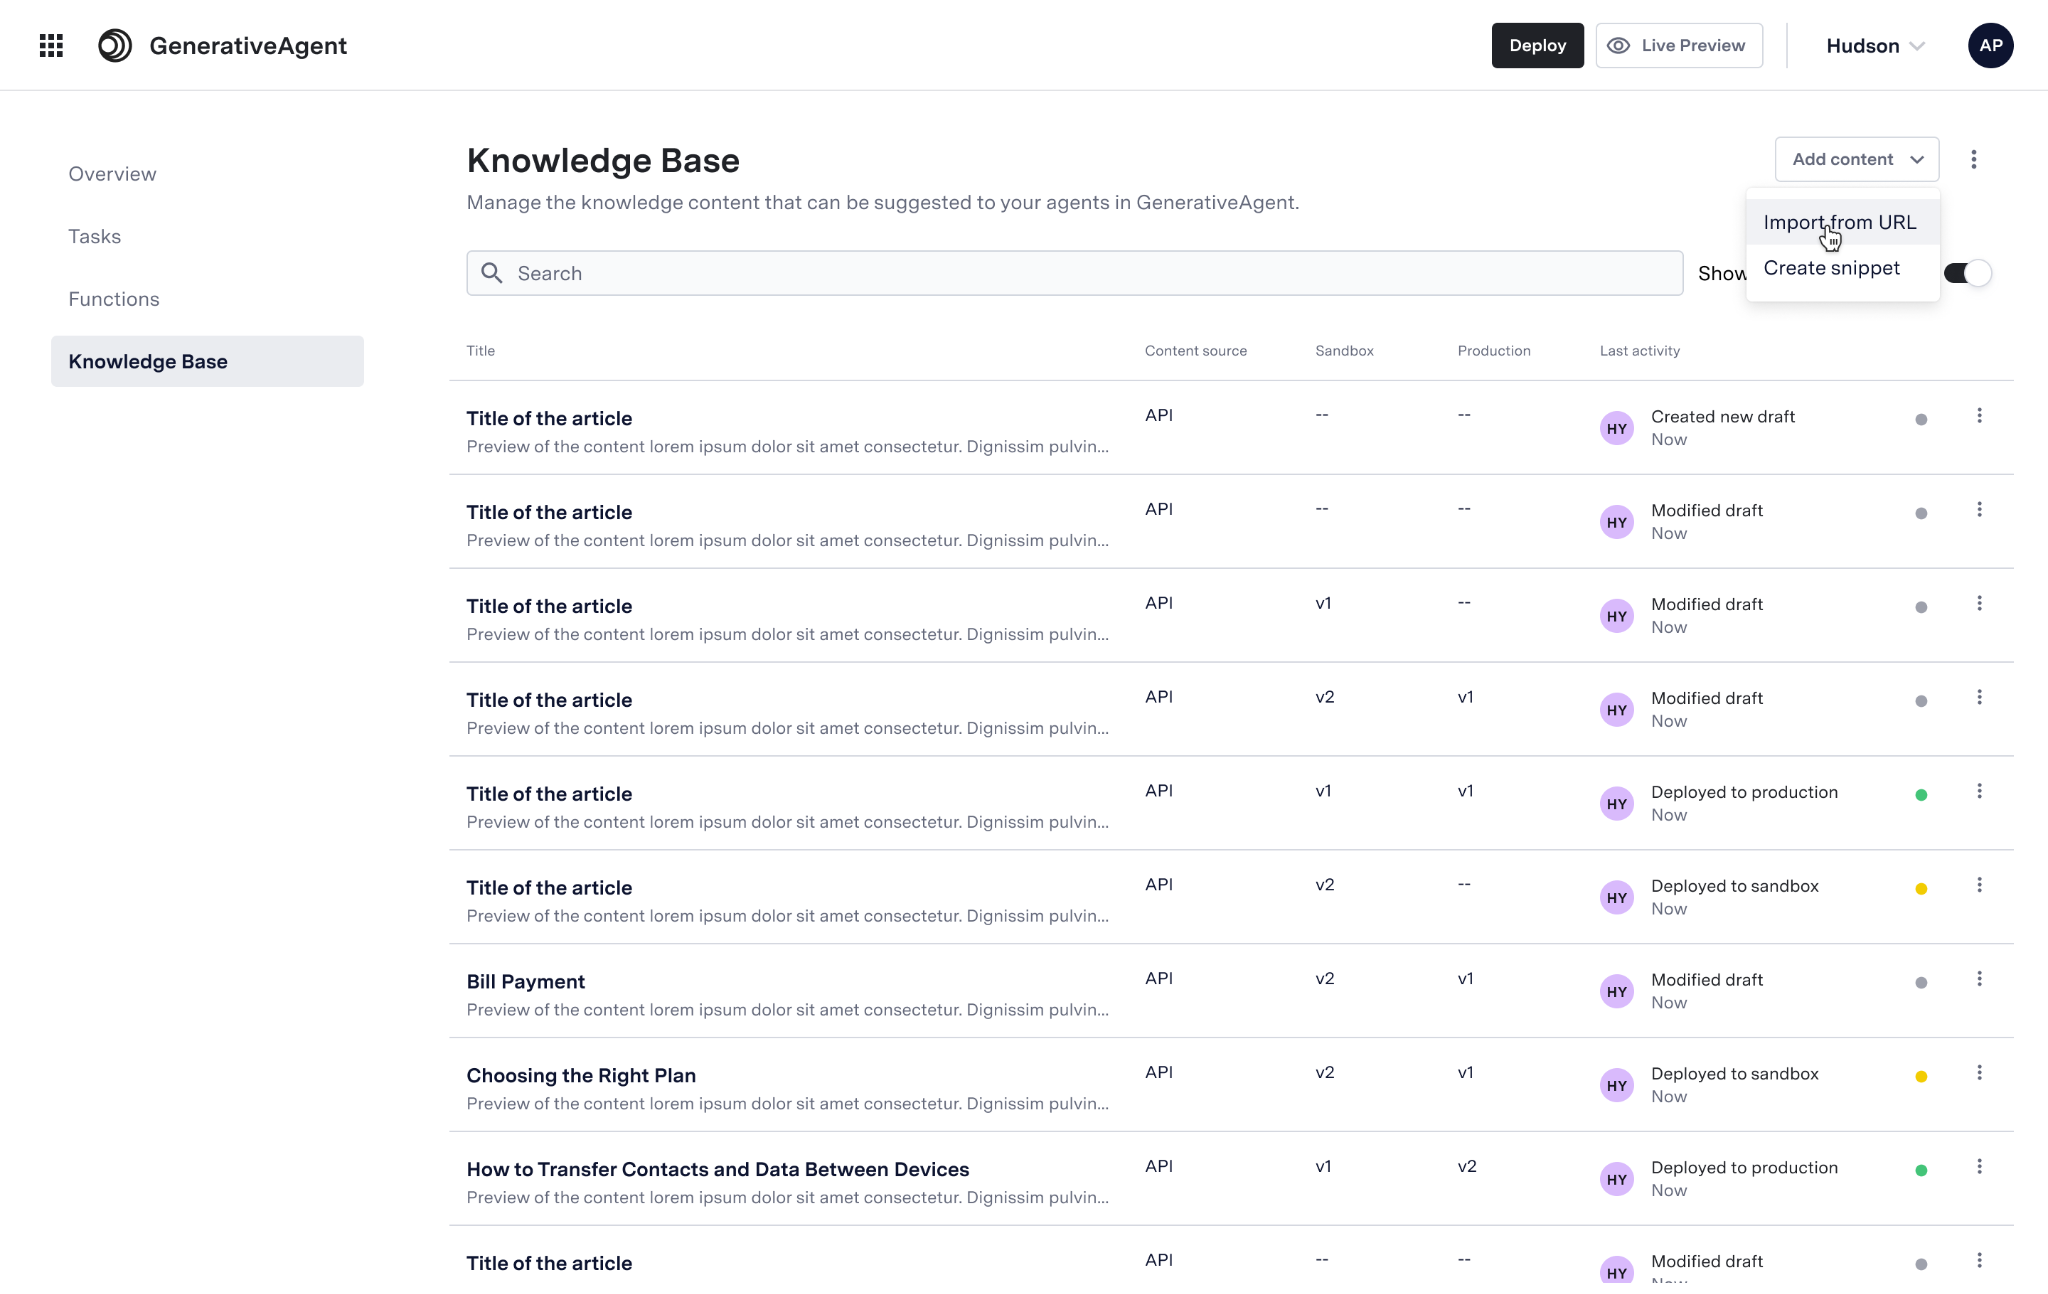
* Navigating to GenerativeAgent > Knowledge in the ASAPP dashboard
* Clicking **Add content**
* Choosing from:
* **Import from URL**
* **Create Snippet**
* **Add via API**
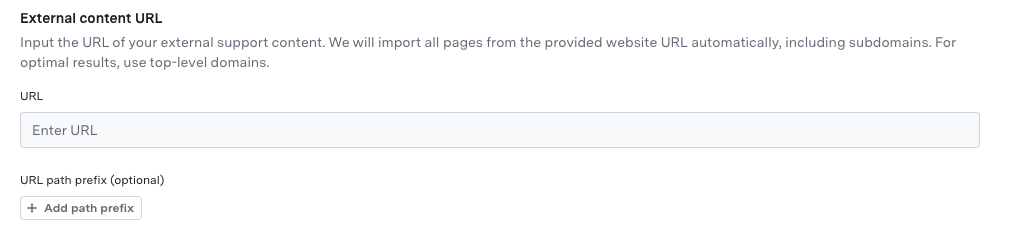
Importing from a URL lets you specify a site or page for the crawler to harvest articles.
1. Select **Import from URL**
2. Enter the URL to start the import
3. (Optional) Use URL Prefixes or Excluded URLs to target specific sections
4. Click **Import content**
GenerativeAgent's Knowledge Base is designed to store reference material that GenerativeAgent can use to answer a variety of customer questions—both explicit (“What is the return policy?”) and implicit (“I don't understand ‘eligible for store credit’”).
GenerativeAgent determines if a question should be answered from the Knowledge Base and searches for the most relevant content.
To configure your Knowledge Base, you need to:
1. Import your knowledge base
2. Configure sync and deployment preferences
3. Deploy knowledge base articles
Do not upload internal, agent-facing knowledge base material intended only for live agents. Use GenerativeAgent’s task instructions for internal-only guidance.
## Step 1: Importing Your Knowledge Base
You can import content by:
* Navigating to GenerativeAgent > Knowledge in the ASAPP dashboard
* Clicking **Add content**
* Choosing from:
* **Import from URL**
* **Create Snippet**
* **Add via API**
Importing from a URL lets you specify a site or page for the crawler to harvest articles.
1. Select **Import from URL**
2. Enter the URL to start the import
3. (Optional) Use URL Prefixes or Excluded URLs to target specific sections
4. Click **Import content**
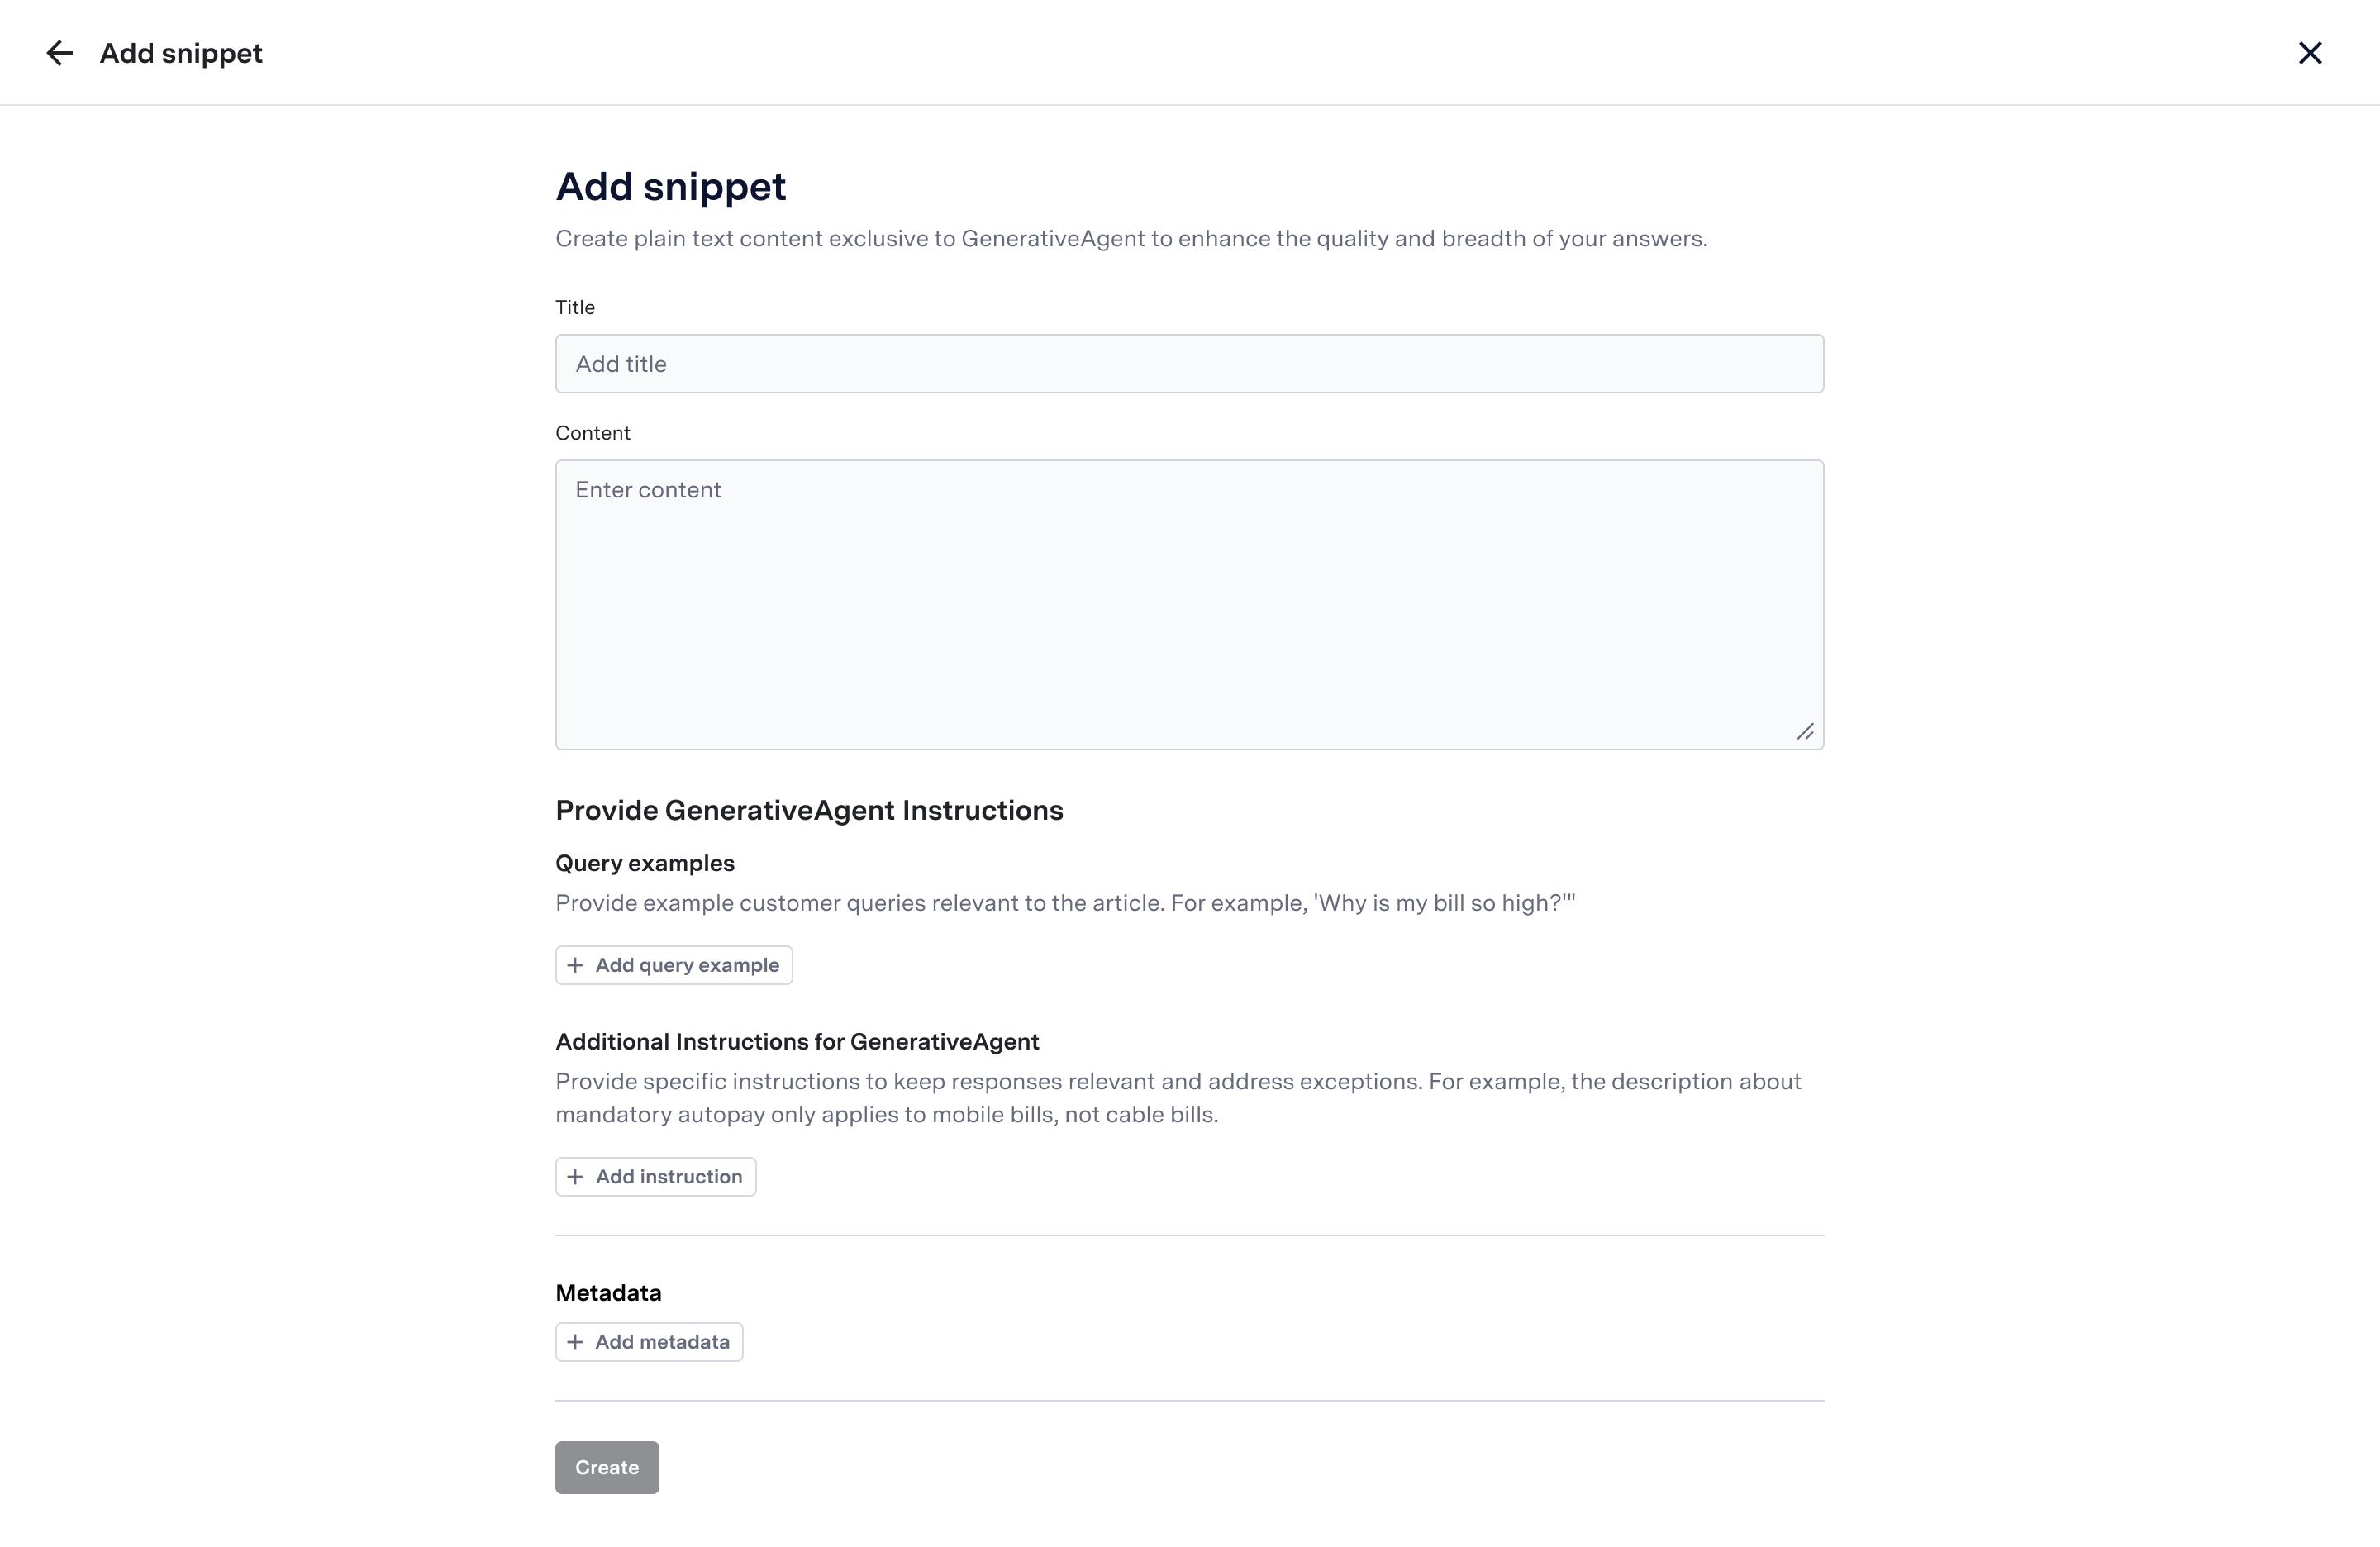
 Snippets are stand-alone articles created manually.
1. Click **Create Snippet**
2. Enter the article’s title and content
3. Optionally add instructions and metadata
Snippets are stand-alone articles created manually.
1. Click **Create Snippet**
2. Enter the article’s title and content
3. Optionally add instructions and metadata
 Programmatically add or update articles using the Knowledge Base Article Submission API.
 ## Step 2: Configure Sync & Deployment Preferences
When adding or modifying a content source, you now have advanced control over how and when it syncs and how updates are deployed to production.
**Automatic update options:**
## Step 2: Configure Sync & Deployment Preferences
When adding or modifying a content source, you now have advanced control over how and when it syncs and how updates are deployed to production.
**Automatic update options:**
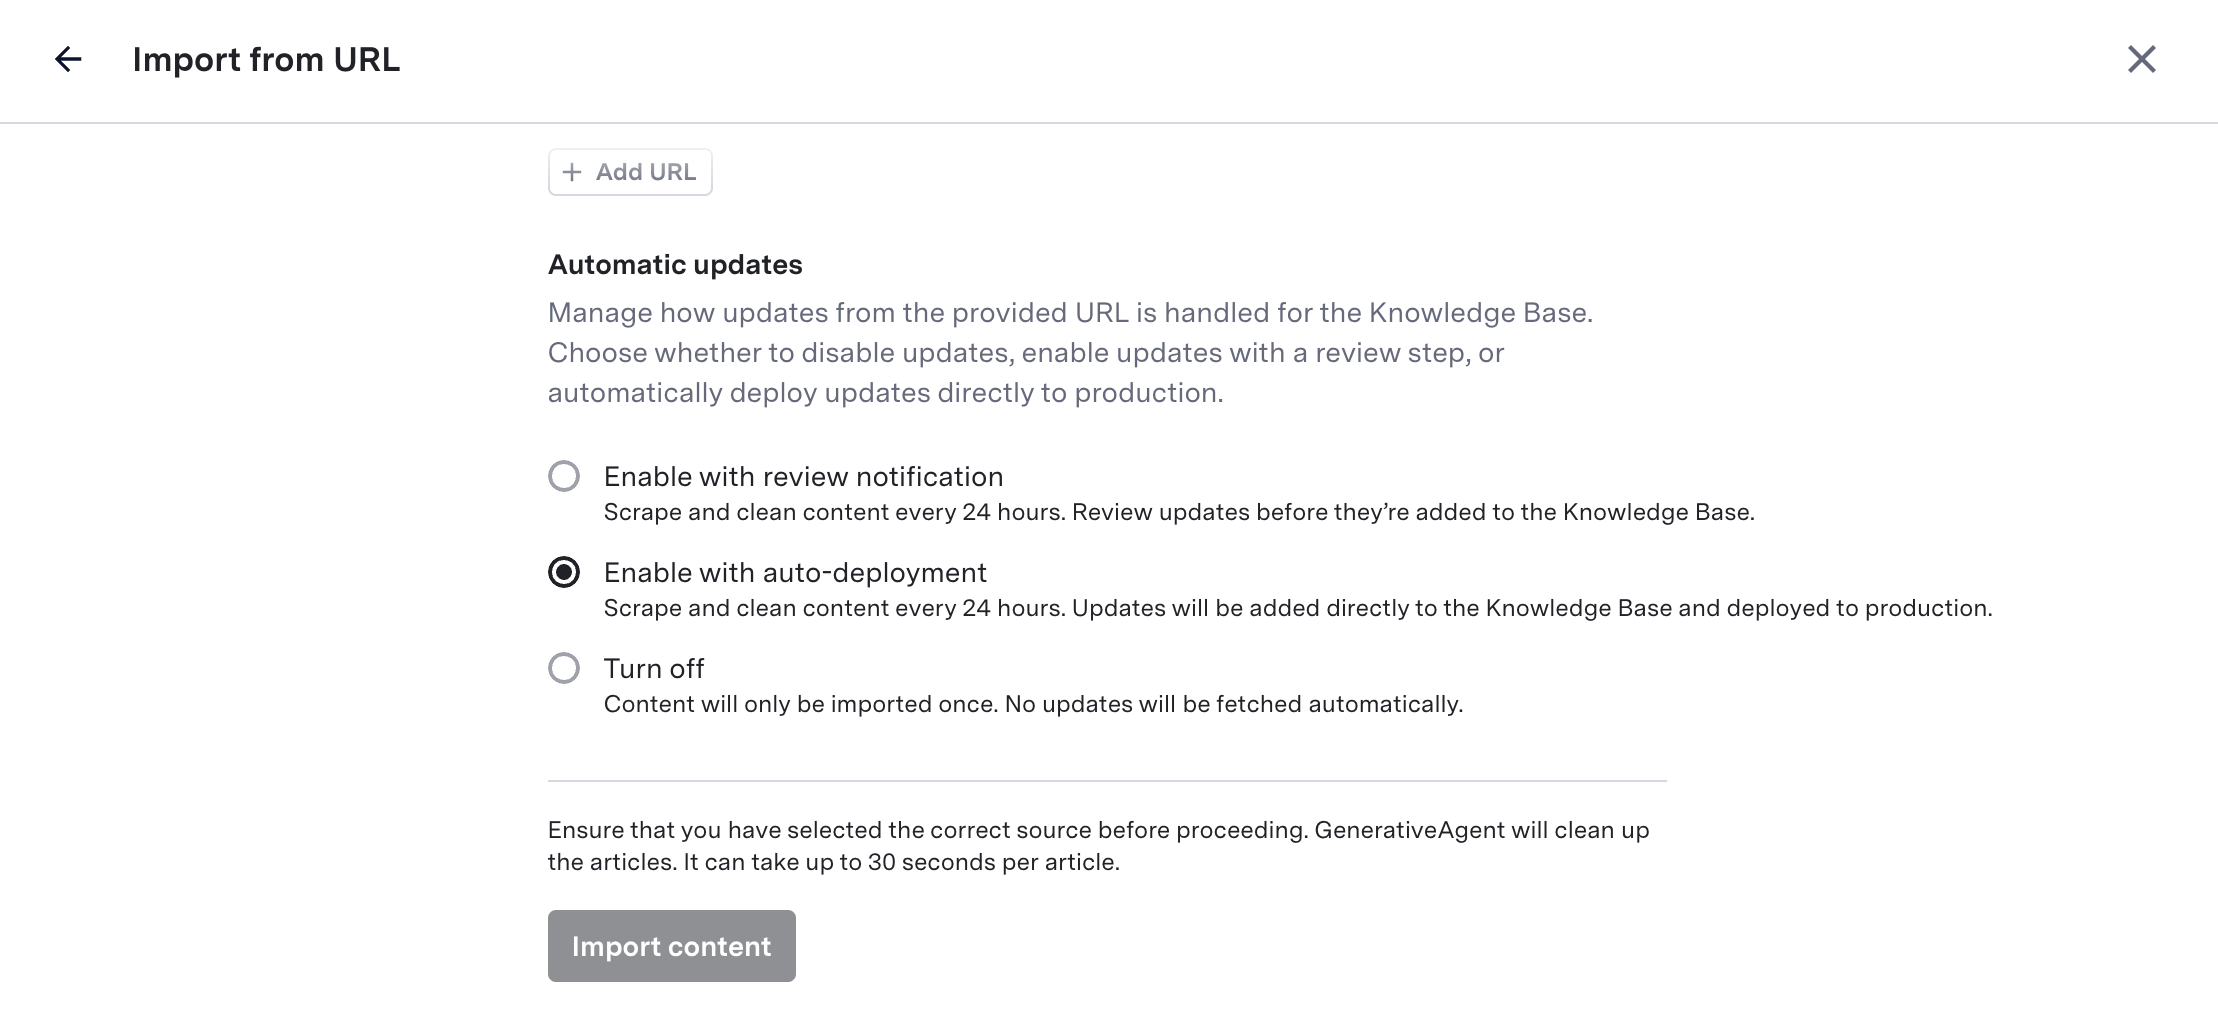 * **Enable with review notification**\
Scrapes and cleans content every 24 hours. Updates require manual review before deployment.
* **Enable with auto-deployment**\
Scrapes and cleans content every 24 hours. Updates are *immediately* deployed to production, bypassing the review process.
* **Turn off**\
Import content only once. No automated updates.
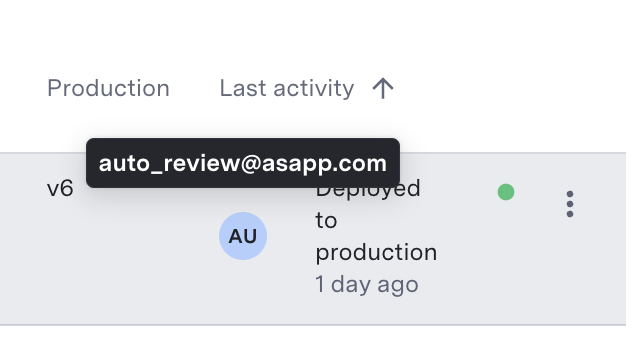
> You can adjust this setting anytime in the content source management screen. The current sync mode is visually indicated for each source.
* **Enable with review notification**\
Scrapes and cleans content every 24 hours. Updates require manual review before deployment.
* **Enable with auto-deployment**\
Scrapes and cleans content every 24 hours. Updates are *immediately* deployed to production, bypassing the review process.
* **Turn off**\
Import content only once. No automated updates.
> You can adjust this setting anytime in the content source management screen. The current sync mode is visually indicated for each source.
 ## Step 3: Article-Level Frequent Refresh (Critical Updates Only)
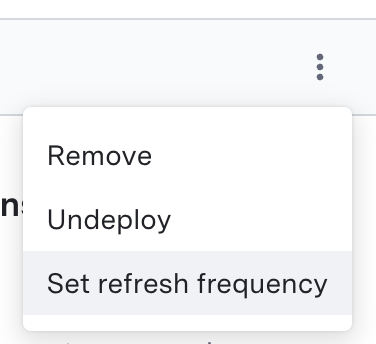
You can override the sync and deployment setting of the content source for specific, time-sensitive articles:
1. Click the three-dot menu next to the article and select **Set refresh frequency**.
## Step 3: Article-Level Frequent Refresh (Critical Updates Only)
You can override the sync and deployment setting of the content source for specific, time-sensitive articles:
1. Click the three-dot menu next to the article and select **Set refresh frequency**.
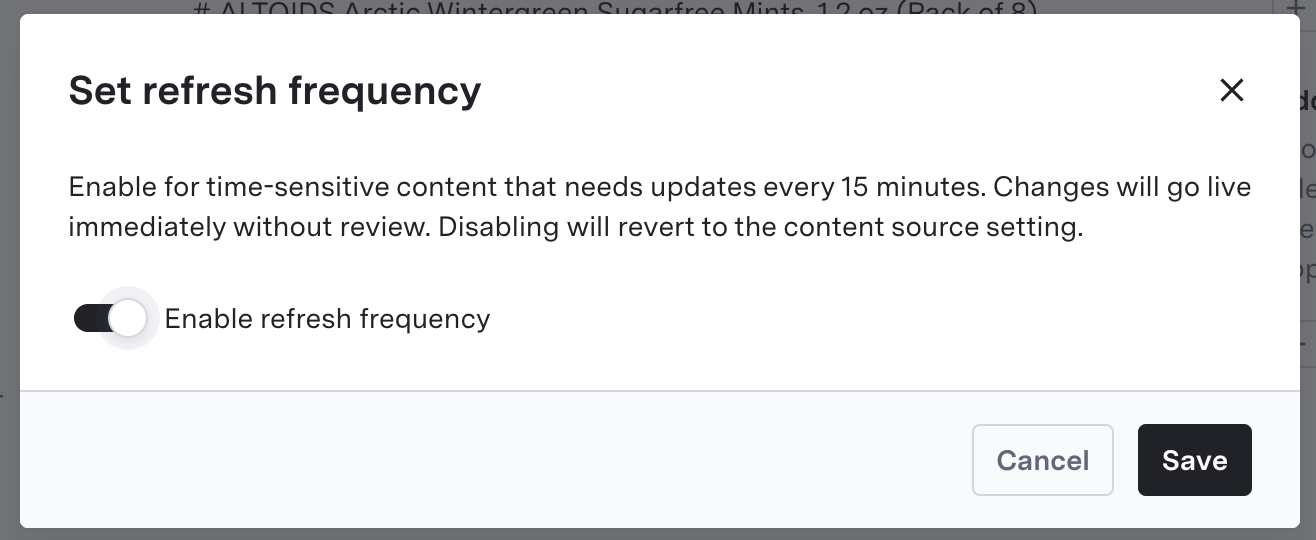
 2. In the dialog, enable **refresh frequency** for updates every 15 minutes.
* Updates will be auto-deployed to production immediately, even if your content source normally requires review.
* Disabling will revert to the content source's settings.
2. In the dialog, enable **refresh frequency** for updates every 15 minutes.
* Updates will be auto-deployed to production immediately, even if your content source normally requires review.
* Disabling will revert to the content source's settings.
 Use frequent refresh and auto-deploy only for critical, time-sensitive articles (e.g., live incident or service disruption updates). These changes will go live immediately without review.
## Step 4: Deploying Your Knowledge Base
Once imported and configured, deploy your Knowledge Base and changes to your desired environment for GenerativeAgent. This ensures users receive the most accurate and timely information.
Deployment is managed as part of the [generative agent deployment process](/generativeagent/configuring/deploying-to-generativeagent).
## Reviewing Imported Articles
By default, imported articles (from URL/API) require review and publishing (unless auto-deploy is enabled for the source or article).
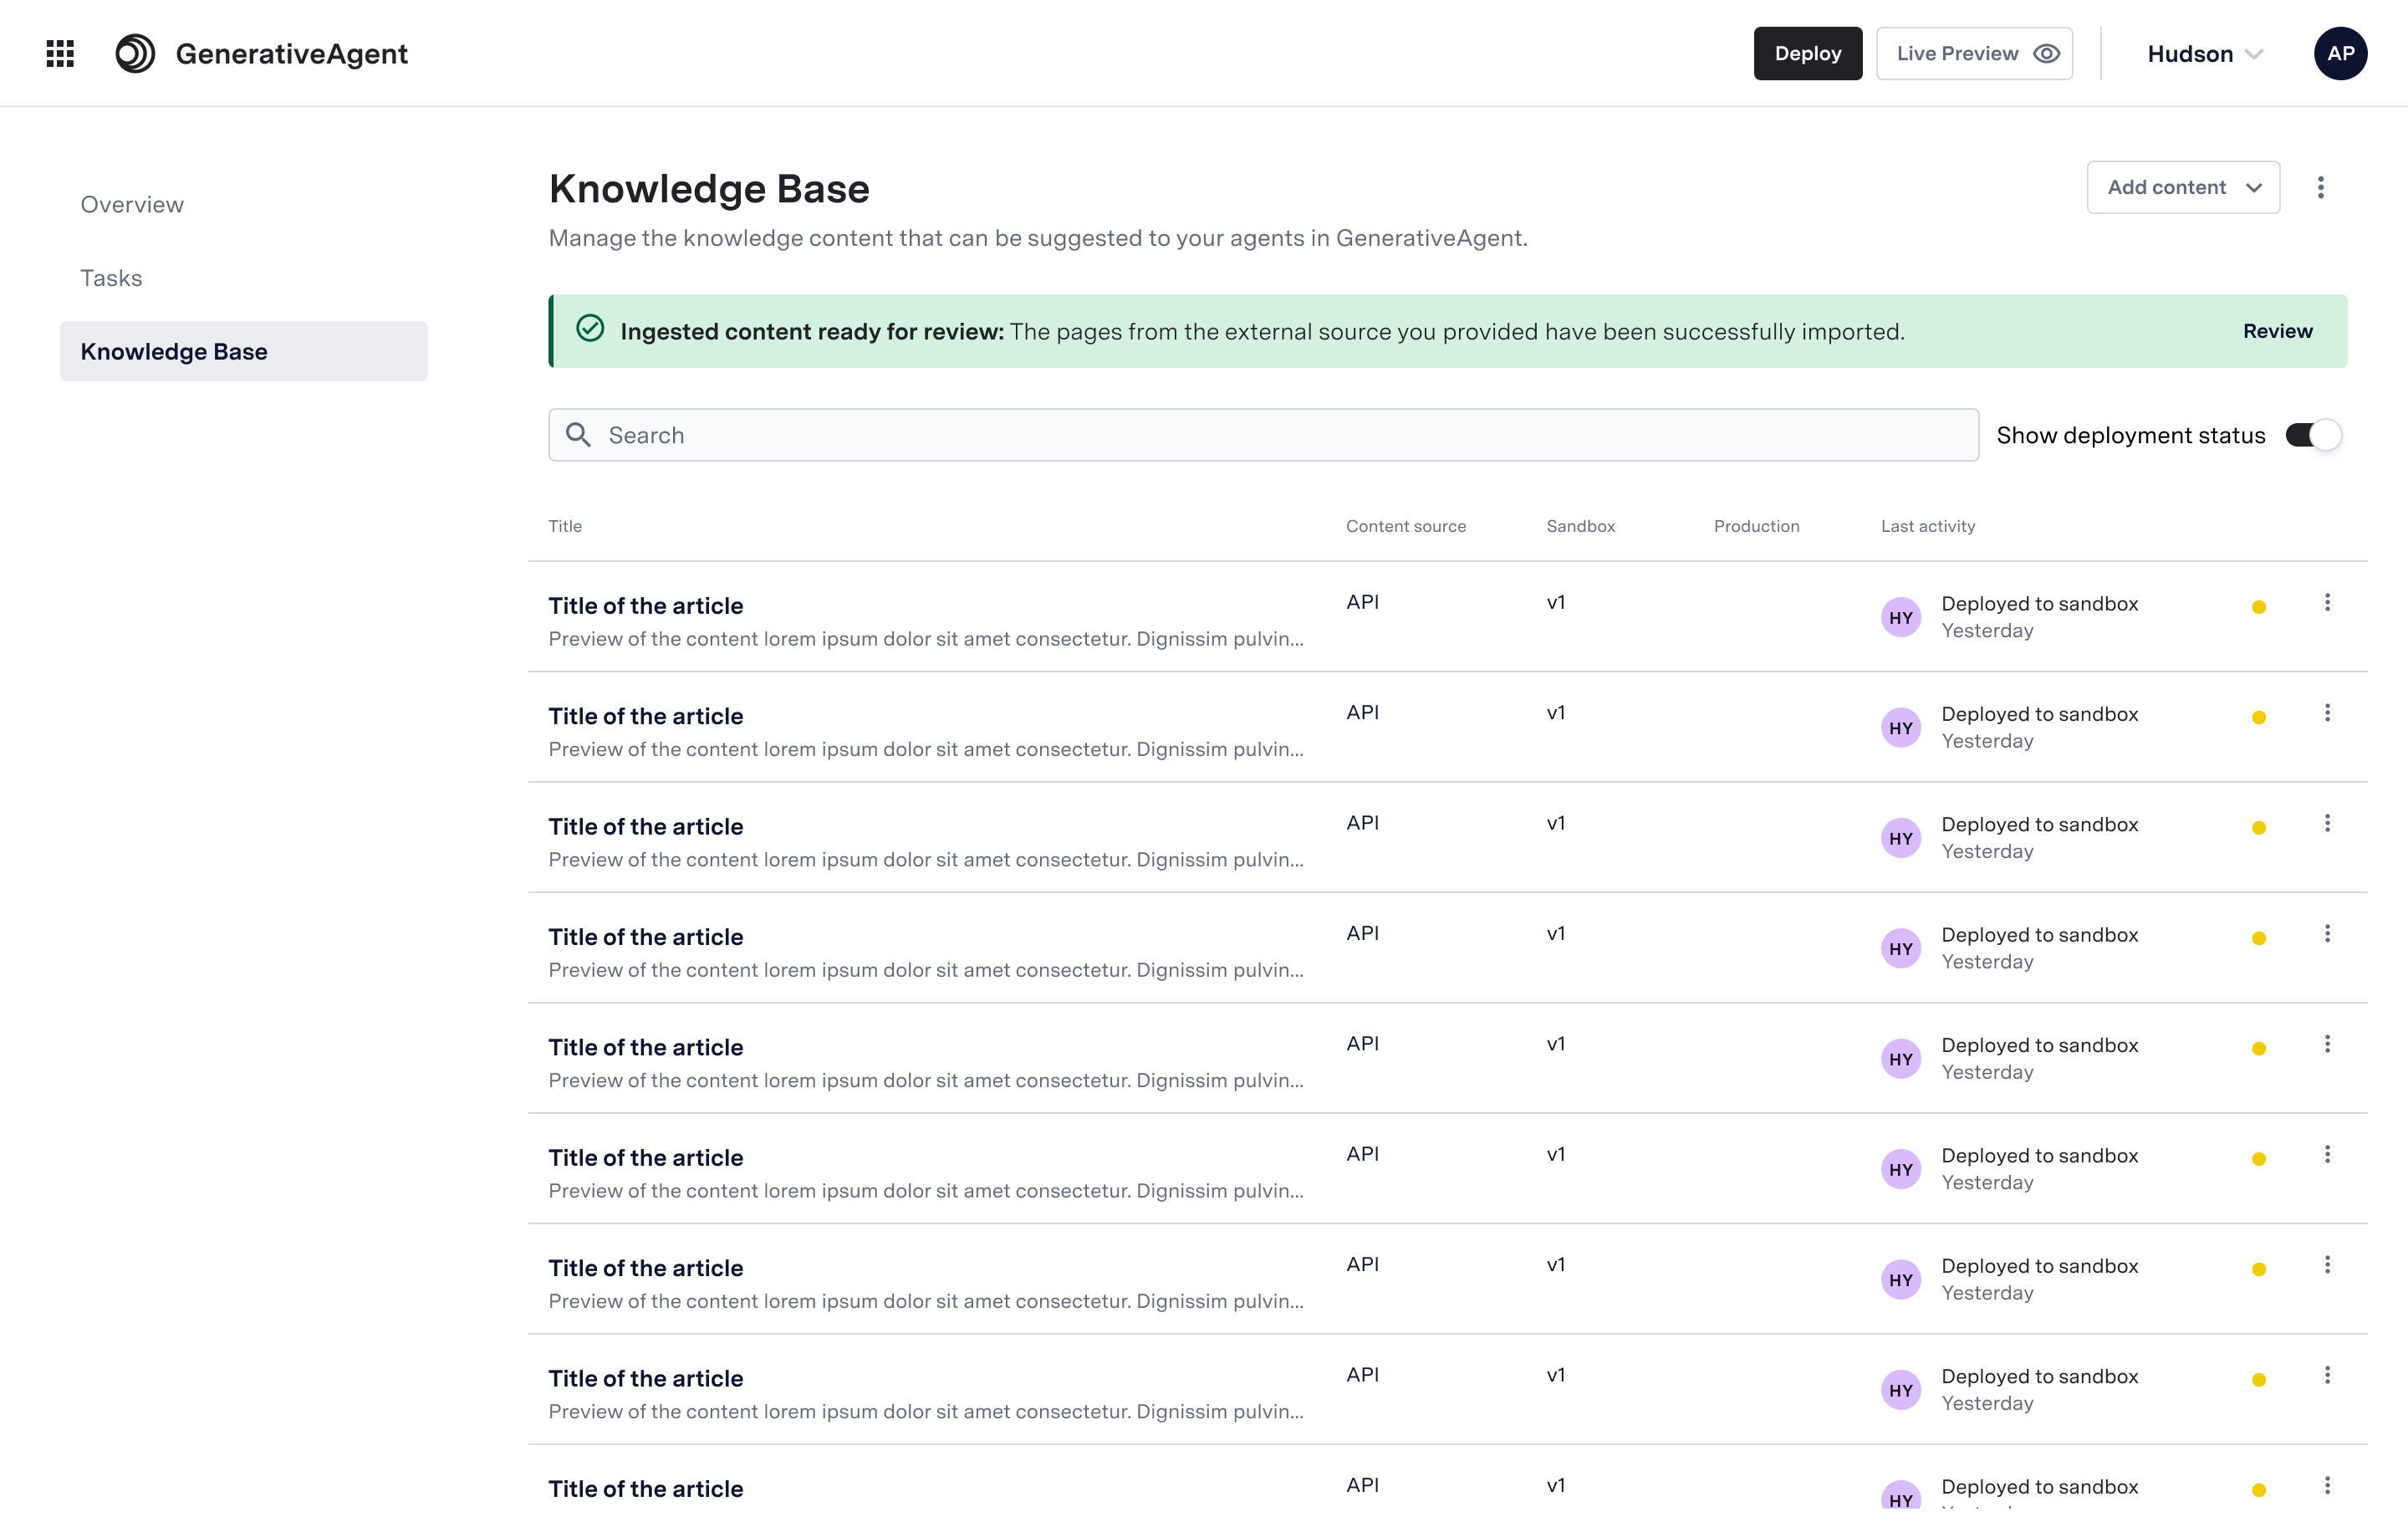
If articles are pending review, a banner will appear at the top of the Knowledge Base page.
Use frequent refresh and auto-deploy only for critical, time-sensitive articles (e.g., live incident or service disruption updates). These changes will go live immediately without review.
## Step 4: Deploying Your Knowledge Base
Once imported and configured, deploy your Knowledge Base and changes to your desired environment for GenerativeAgent. This ensures users receive the most accurate and timely information.
Deployment is managed as part of the [generative agent deployment process](/generativeagent/configuring/deploying-to-generativeagent).
## Reviewing Imported Articles
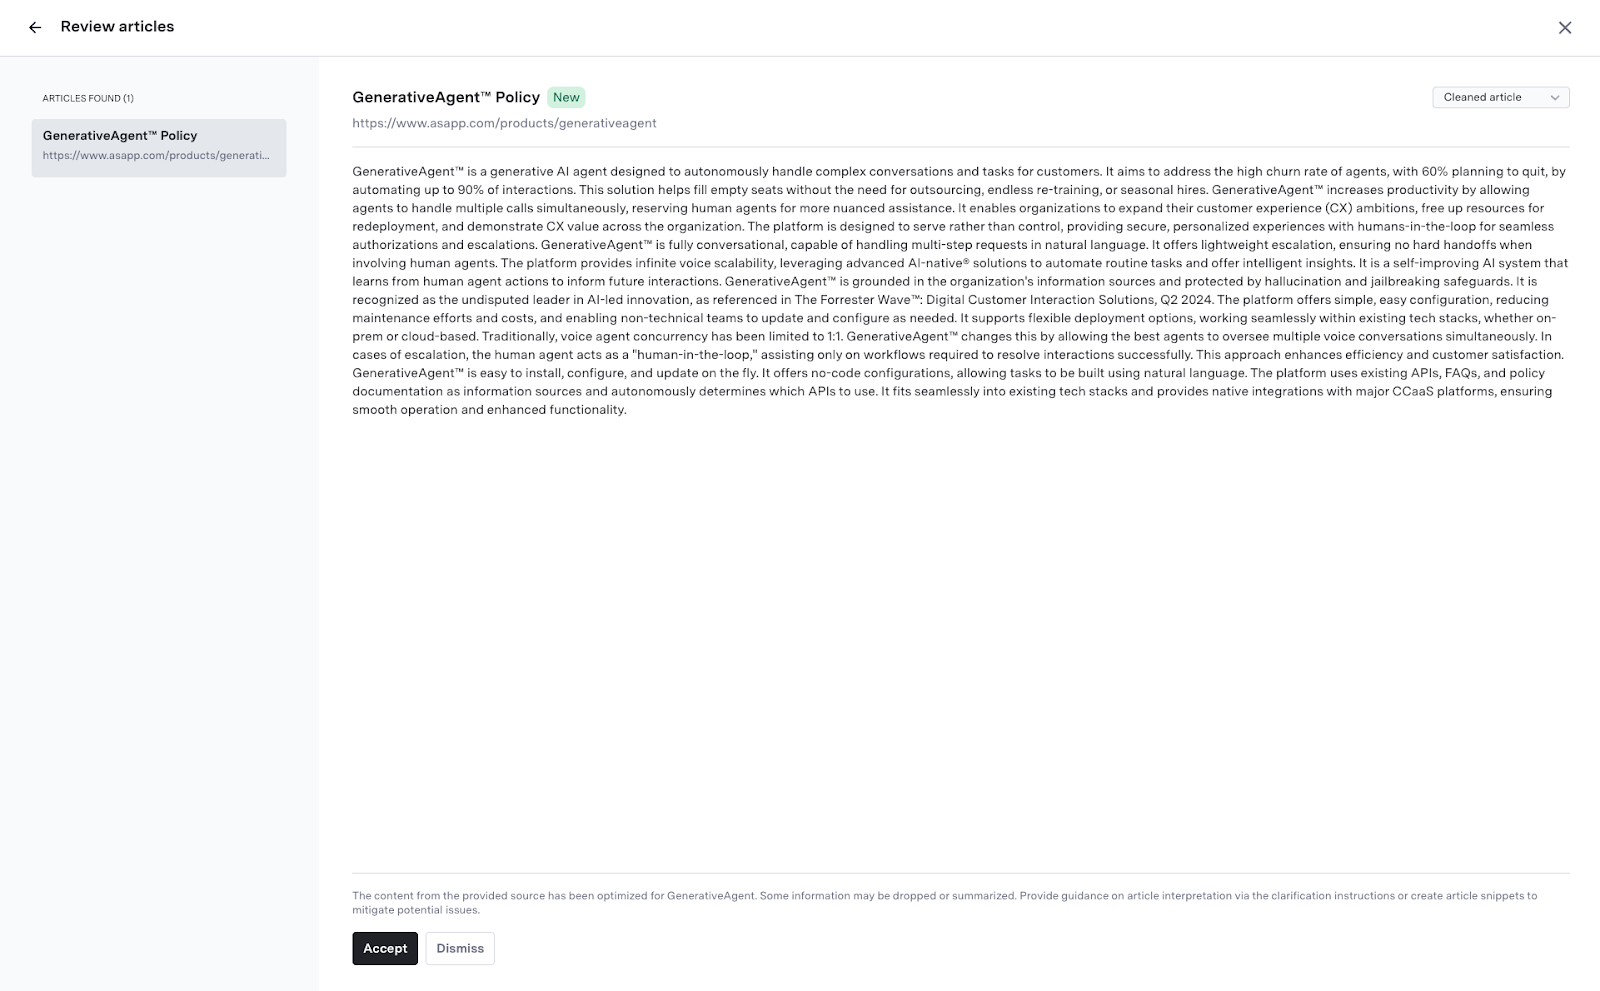
By default, imported articles (from URL/API) require review and publishing (unless auto-deploy is enabled for the source or article).
If articles are pending review, a banner will appear at the top of the Knowledge Base page.
 You can choose between a cleaned-up or raw version of each article before publishing.
 > If an article is updated (by new crawl or API update), the same rules apply:
>
> * Requires re-review if the parent content source is in review mode
> * Deploys instantly if in auto-deploy or frequent refresh mode
## Visual Indicators & Notifications
* Sync and deployment status is shown both for sources and individual articles.
* Recent auto-sync and deployment activity can be reviewed in audit logs or dashboards.
***
## Optimizing GenerativeAgent Article Usage
Boost GenerativeAgent’s accuracy and retrieval behavior by leveraging:
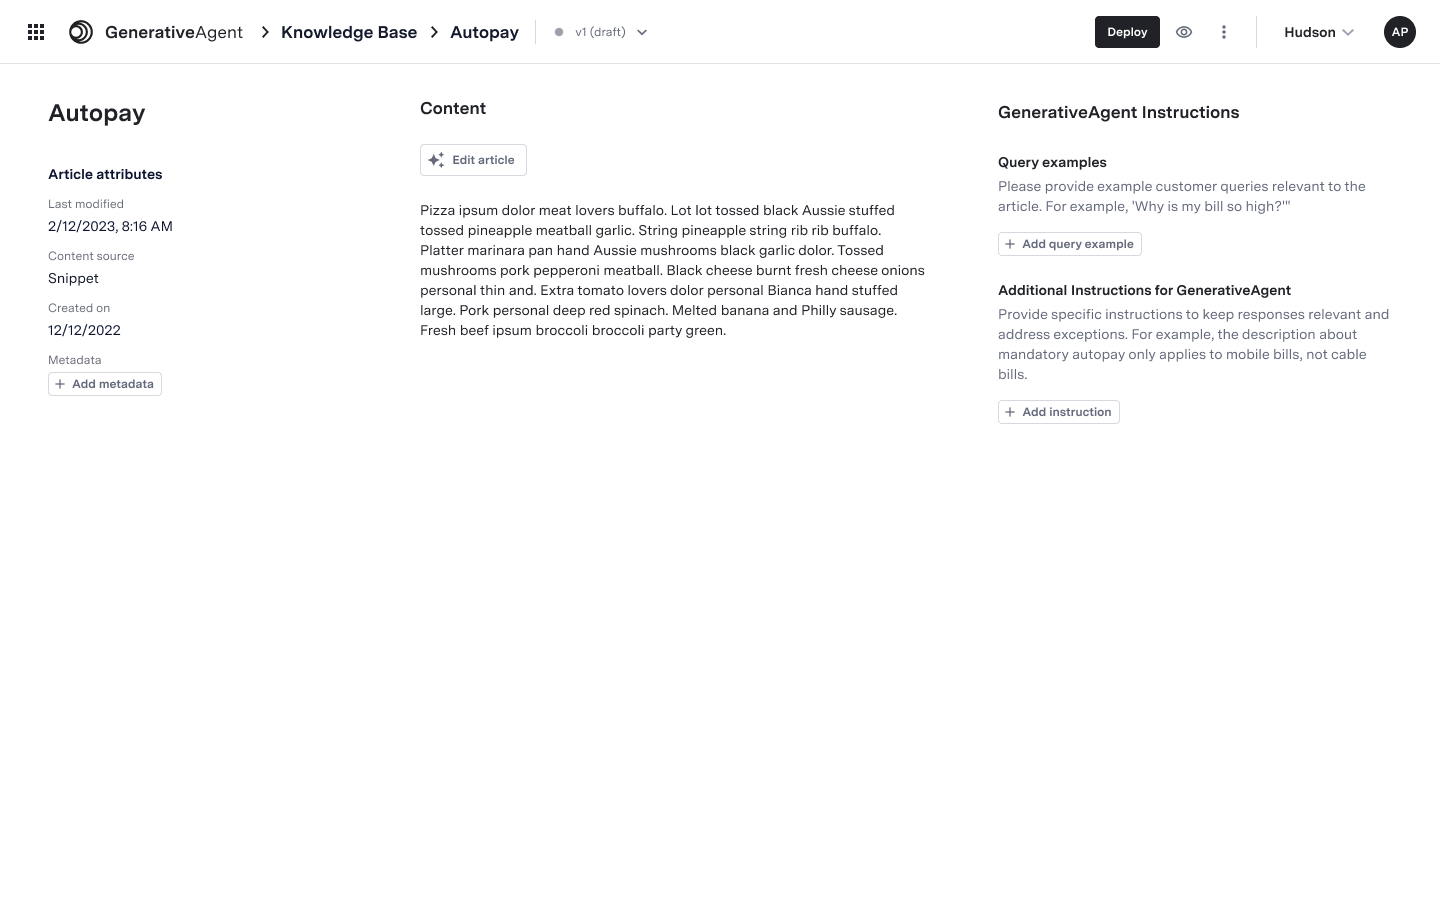
### Query Examples
Add typical customer questions to help surface relevant content:
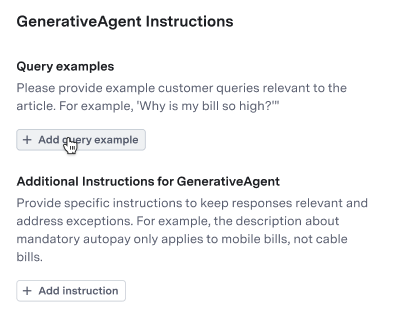
1. In the “GenerativeAgent Instructions” column, click **Add query example**
2. Enter common questions as needed
> If an article is updated (by new crawl or API update), the same rules apply:
>
> * Requires re-review if the parent content source is in review mode
> * Deploys instantly if in auto-deploy or frequent refresh mode
## Visual Indicators & Notifications
* Sync and deployment status is shown both for sources and individual articles.
* Recent auto-sync and deployment activity can be reviewed in audit logs or dashboards.
***
## Optimizing GenerativeAgent Article Usage
Boost GenerativeAgent’s accuracy and retrieval behavior by leveraging:
### Query Examples
Add typical customer questions to help surface relevant content:
1. In the “GenerativeAgent Instructions” column, click **Add query example**
2. Enter common questions as needed
 ### Additional Instructions
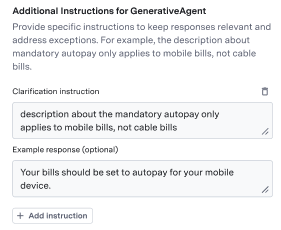
Provide special clarifications or company-specific answers:
1. Click **Add Instruction**
2. Write a clear clarification or sample response
### Additional Instructions
Provide special clarifications or company-specific answers:
1. Click **Add Instruction**
2. Write a clear clarification or sample response
 ### Article Metadata
Use metadata to ensure specific articles are only used for relevant tasks.
1. Navigate to the article and click **Edit Metadata**.
2. Add or modify metadata keys to enable targeted article discovery and control.
### Search & Filter
Easily find or bulk manage articles using metadata, status, content source, creator, or deployment state.
### Article Metadata
Use metadata to ensure specific articles are only used for relevant tasks.
1. Navigate to the article and click **Edit Metadata**.
2. Add or modify metadata keys to enable targeted article discovery and control.
### Search & Filter
Easily find or bulk manage articles using metadata, status, content source, creator, or deployment state.
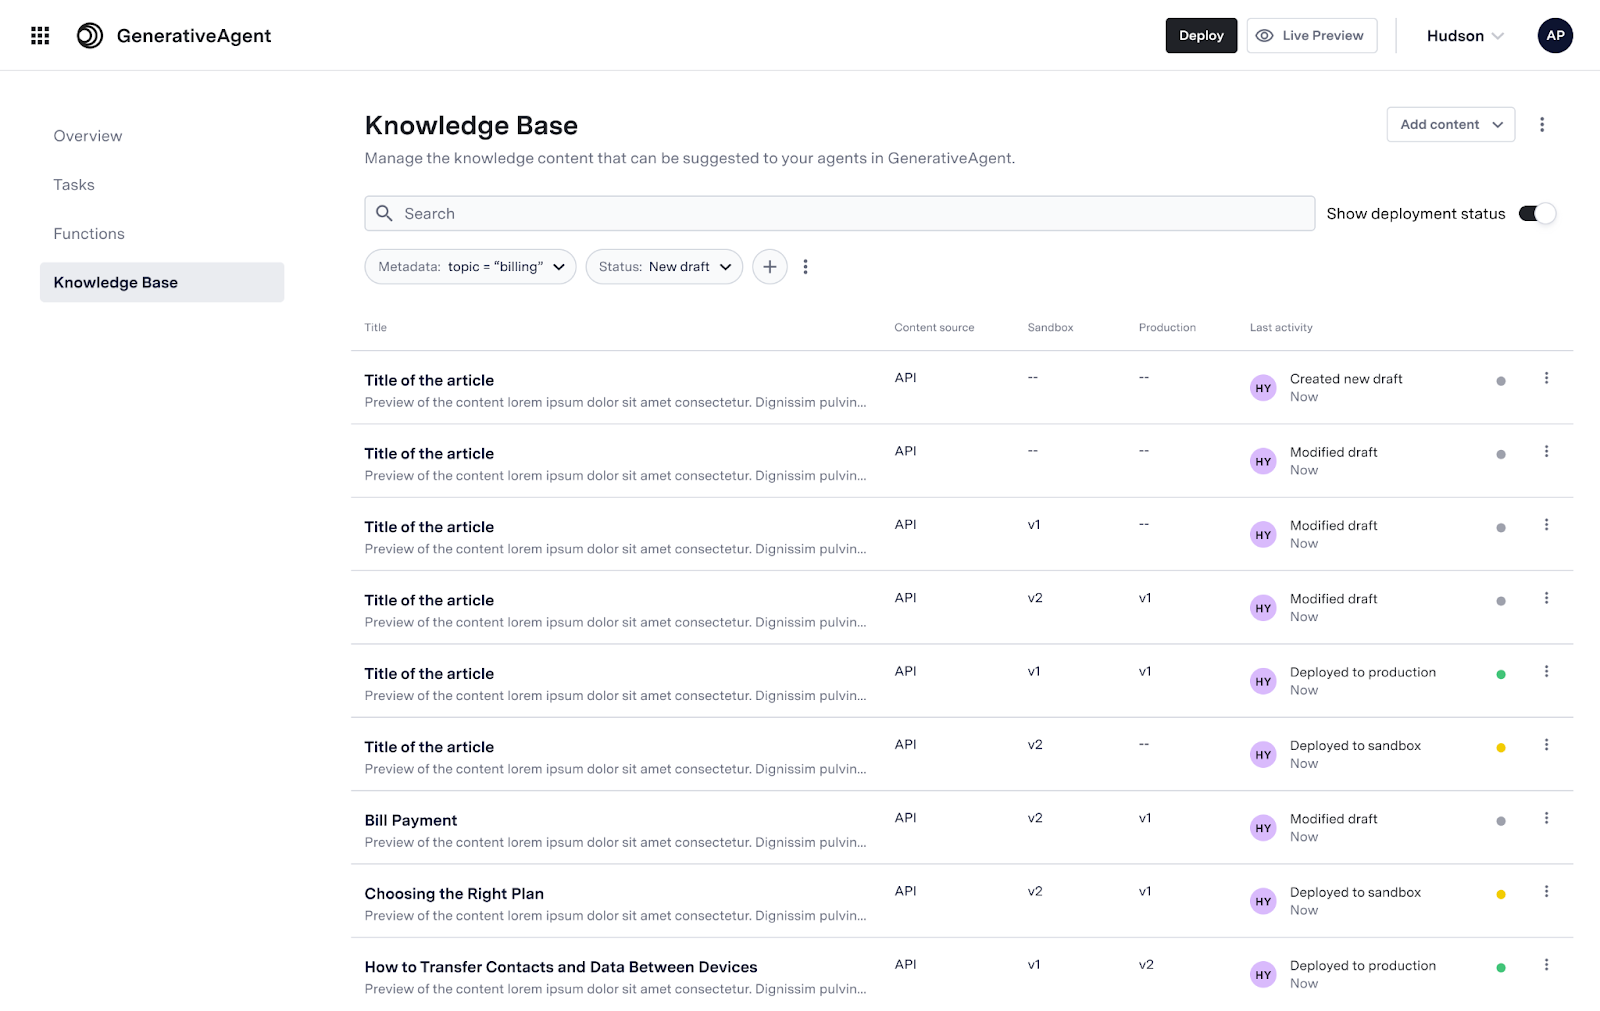
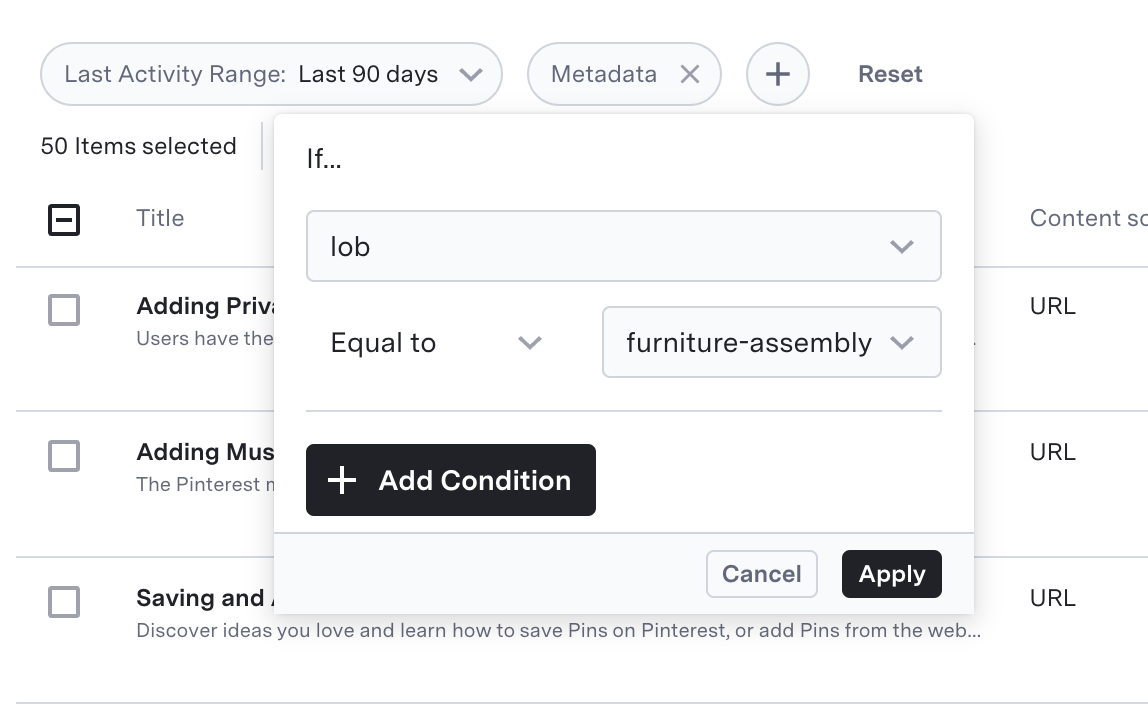 You can select and combine multiple filters with "AND" for precise searching.
## Preview
Quickly test live how GenerativeAgent uses your knowledge base:
1. Click the eye icon next to "Deploy"
You can select and combine multiple filters with "AND" for precise searching.
## Preview
Quickly test live how GenerativeAgent uses your knowledge base:
1. Click the eye icon next to "Deploy"
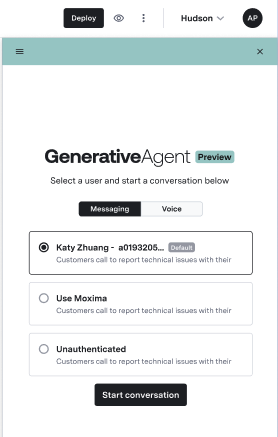 2. Start a test conversation to see answers pulled from your knowledge base
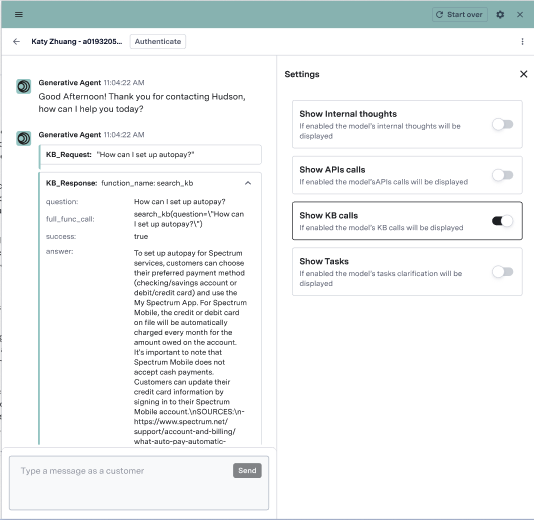 For more details, see the [Previewer guide](/generativeagent/configuring/previewer).
## Next Steps
Explore further integration topics:
For more details, see the [Previewer guide](/generativeagent/configuring/previewer).
## Next Steps
Explore further integration topics: